
|
|


Tips, Resources, and Advice by Amanda Katz (SRAJD #1220) |
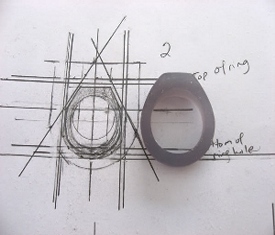
The first thing to do when starting a new technique is read as much as you can out there that you can find. For my first project, the signet rings, I found two great sites with solid basic advice on how wax behaves when being carved. Kate Wolf on Ganoksin discusses what the journey is like for her in carving and tips on fixing cracks and mistakes. It's only part one of two articles but is still relevant. Charles Lewton-Brain entered a good article on how to make your own wax carving tools. The best advice on how to handle wax came from Jason Bellchamber. Jason kindly has made the introduction of his first seminar on wax carving a ring free for all to read. Read through this before doing your own carving first as he gives very sound advice and tips. When starting a wax-carving project you need to plan. Draw the shape from several different views in 1:1 real size drawings so there is a firm idea of how the shape will turn out before starting. These views also give visual reference as to what wax needs to be removed. The next step is have all the tools needed at hand before starting, a good sturdy box to store it all in and a smaller cotton wool lined padded box to store the wax piece while in work. There is nothing more frustrating than to sit down for another carving section to have the one tool needed missing! When carving, have a lot of light and a place that is easily cleaned up from all the wax shavings that get everywhere quickly. I usually digitize my drawings and then print them out numerous times on paper so that I do not lose my original ideas and have copies I can cut out and glue onto the wax piece to be carved if necessary. To start out I carefully designate X, Y and Z axis on the drawings AND on the block of wax for reference points. As I carve down, I always try to maintain these reference lines as they assist in keeping symmetry until I am at the final desired shape. Large holes can be drilled with an electric drill and will give consistent sizes. Refer to your drawings often as well to compare what is going on. |
For a flat design try taping the little picture onto the wax tablet and use a sharp sewing pin to lightly score the design into the wax. Then it is a process of carving away the unwanted bits and protecting the desired shape. During this process I usually end up using the half round tapered needle file the most. As wax tablets are slightly opaque it is a good idea to hold it against a light source as you can see the light in different shades thick being darker. This is a great means to see if your thicknesses are consistent. |
The important part as you carve is taking your time. Take off less at a time and be right the first time. I do not use burs on my dremel to take off wax, I like the hand carving process even though it takes longer. I have more control what is happening this way. At every step I compare the carving to the original drawings (with the same reference points drawn on) to see how it is going. |
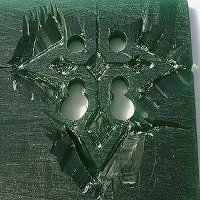
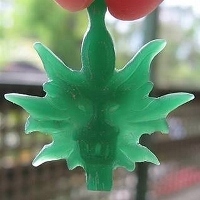
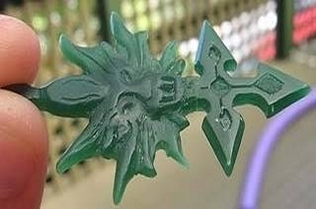
As you are carving more of the gross bulk away from your design, there is a period of what Kate Wolf refers to the 'amateur hour' where the carving looks like a huge mess. Keep persevering and eventually parts of the carving will just look right. Then when the shape is there, move to filing away with sand paper so there is greater control of what is taken off without taking off too much. If you take too much wax off, use the melting techniques mentioned in Kate Wolf's article to add wax back to start carving that area again. Basic knowledge here is that wax needs to be slightly melted in order for it to stick together solidly. Just putting a ball of melted wax on cold wax will produce a bead of wax that comes right off when you try to carve into it. This is a very scary technique and I highly suggest to practice on unwanted wax first until you're comfortable with the procedure. I used my gas-stove top to heat up a thin dental tool, and then used the tool to melt where I needed more wax to build up with. Then used the same tool to melt wax onto my carving. Then use the hot tool to literally mix the added wax to the established wax area and fully let cool by air. Then the carving process went on without a hitch on the lion face. Sometimes a piece is too complicated to do in one go. In that case break down individual aspects and work on them independently until each are perfect, then use the melting technique to join together. I joined the lion head to the cross carving this way. |
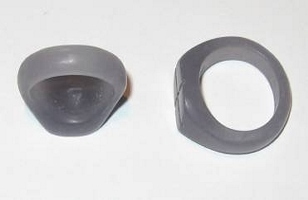
A really neat (and sometimes frustrating) aspect of lost wax casting is that whatever is on your wax will show up in your casted piece. This means if you leave scratches in the wax model, you will have corresponding scratches in your casting piece to clean off! Wax is a much easier material to bring to a high polish. In my experience it is best to do the same sand paper polish to the wax piece up to the final 1500 (or higher) sand grit as you would a finished piece of metal jewellery just before using polishing compounds. This means your casted piece will be much cleaner! Here is an example of a couple signet rings in wax model I deemed ready for casting. |
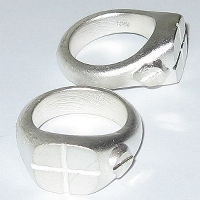
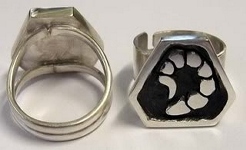
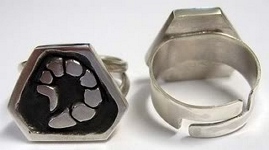
Here are the same rings after being cast in sterling silver. Note that the metal is a bit rougher than the wax models and there is a large burr that will require some work. I use casting companies to do my casting, as I am not set up to do so at home. I find it very cost effective. |
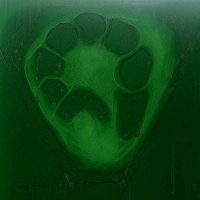
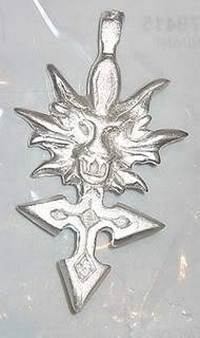
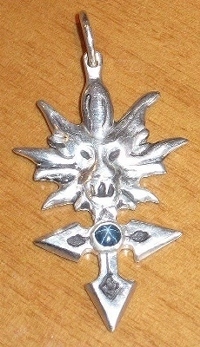
Here is another example of a recently cast item after a bit of cleaning before the photograph was taken |
After using regular metal jewellery cleaning techniques the end result is fantastic. Use polishing, texturing and chemical treatments to shade as desired. |
To see Amanda Katz's website, please click here. © Amanda Katz. No part or parts of this article may be used, copied, or distributed without prior written permission by the owner: Amanda Katz |